Category: Technology

Disk- and Memory-Upgrade of a QNAP TS 259 NAS

Disk- and Memory-Upgrade of a QNAP TS 259 NAS

Last summer, the disks of my 4 years old QNAP-NAS with 1TB of space were filled for about 90%.

So what to do?

After some online research, I found out that:

  • The disks can be replaced and the size of the RAID will be extended to the new disk size. What means no system reset is needed and all the configuration that is in place will also be there after the disk replacement
  • It’s not only possible to extend the disk space, but also the memory (RAM) of the device
With this information given, I decided to buy two new 3 TB disks and a 2GB SODIMM module, mainly because I use my NAS not only as data storage, but also as web, db and pbx (asterisk) server. To reconfigure all this stuff on a new NAS would have taken a lot of time.

And how?

First of all, create a backup of all your data! In my case, I didn’t need it, but when something really goes wrong…

Memory Upgrade 1GB->2GB

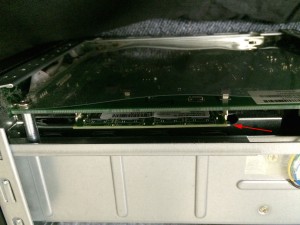
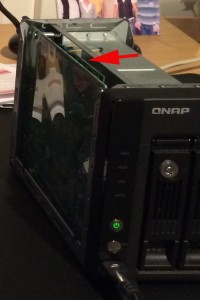
The memory upgrade was quite easy. The though part was to find a module that matches. I finally decided to buy a Kingston KVR800D2S6/2G module from digitec.ch. Because the replacement of the module needs a bit filigree fingers, my first attempt failed and the NAS wasn’t booting anymore. After a firm second attempt, it counted successfully up to 2GB and booted without any interruption.

Disk replacement 2x1TB -> 2x3TB

This part should also be quite easy because it’s well documented and officially supported by QNAP [1, Expanding Capacity]. For me it worked until step 7, “Expand Capacity”. I tried about 3 times without any success. Obviously, some packages/services on the NAS were interfering with the raid expansion process. At that point it was time to connect to the NAS via console [2].

To extend the capacity manually from the console, I did the following steps:

  1. Check if the raid device is busy
    # lsof /dev/md0

    if this command returns any service/process, shut it down via init script or by kill command

  2. Unmount the raid device
    # umount /dev/md0
  3. Run file system check, this may take a while
    # e2fsck -f /dev/md0
  4. Disable ext3 journaling
    # tune2fs -O ^has_journal /dev/md0
  5. Extend the RAID, this will really take a while
    # resize2fs /dev/md0
  6. Check the file system if everything is fine
    # e2fsck -n /dev/md0
  7. Turn the journaling back on
    # tune2fs -j /dev/md0
  8. Reboot the system
    # reboot

After the reboot, calling # df /dev/md0 showed me the new size of the expanded RAID (2.7T).

[1] http://docs.qnap.com/nas/4.1/Home/en/index.html?raid_management.htm
[2] http://forum.qnap.com/viewtopic.php?t=12109

Reverse caller lookup with asterisk and tel.search.ch

Reverse caller lookup with asterisk and tel.search.ch

To cut the fixed telephone line, I use guest-voip.ch as SIP provider, an asterisk open source PBX installed on my QNAP NAS and some Apple devices (Iphone, IPad and MBP) as phone clients.

Asterisk allows to execute external scripts, so called AGI scripts, to add additional functionality to the PBX. In my case, I use this interface to call a bash script, which lookups the incoming call number in a local text file (cache). If it doesn’t exist in the file, it calls a php script on the local webserver which opens a connection to tel.search.ch with the number as GET parameter and retrieves the search result as answer. The php script then parses the answer, removes any html tags and returns that value to the bash script. The bash script adds the value to the local cache file and returns it back to asterisk.

Additional asterisk configuration (extensions.conf):

exten = s,1,Set(CHANNEL(language)=de)
exten = s,2,AGI(lookup.agi, ${CALLERID(num)})
exten = s,3,Set(CALLERID(name)=${LONGNAME})

Bash script (stored in /var/lib/asterisk/agi-bin):

#!/bin/sh
#
#read agi_request
#read agi_language
#read agi_channel
#read agi_type
#read agi_uniqueid
#read agi_callerid
#read agi_dnid
#read agi_rdnis
#read agi_context
#read agi_extension
#read agi_priority
#read agi_enhanced
#read agi_accountcode
#read emptyline

#pfad zum cachefile
CACHE="/var/spool/asterisk/invsuche_cache"

#pfad um das tempfile anzulegen
TMPFILE="/tmp/tmpsuche.html"
TMPFILE2="/tmp/tmpclir"
LOG="/var/log/asterisk/anrufliste_log"

echo "$1-$2-$3" >/tmp/reverse.tmp

if [ "$1" = " " ] || [ -z "$1" ]; then
echo "Keine Nummer"
#echo | tail -n 10 /var/log/syslog | grep "RING (" >>$TMPFILE2
#if [ "`tail -c 10 $TMPFILE2`" = "z audio) " ]; then
NAME="analoger Anrufer"
DETAILS="Keine details"
#fi
#if [ "`tail -c 10 $TMPFILE2`" = "(Speech) " ]; then
# NAME="aktiv unterdrueckt"
# DETAILS="ISDN anrufer ohne Nummer"
#fi
else
NUMMER=`echo $1 | sed -e "s/\ //g" -e "s/+41/0/"`
echo "Suche nach $NUMMER im cache"
NAME=`awk -F '---' '{ if ($1 == "'$NUMMER'") print $2 }' $CACHE`
if [ -z "$NAME" ]; then
wget -q --tries=3 --timeout=5 -O $TMPFILE "http://gnas/asterisk/telsearch.php?tel=$NUMMER"
NAME=`cat $TMPFILE`
if [ ! -z "$NAME" ]; then
printf "$NUMMER---$NAME\n" >> $CACHE
fi

fi

if [ -z "$NAME" ]; then
NAME="$NUMMER"
fi
fi

###
### Here you can add "additional alert code"
###

# directly source an external scriptlet, for better separation with this publicly updated script
#. /usr/local/asterisk/reverse.agi_notifier_sh

printf "`date +%Y-%m-%d\ %H:%M` $NAME\t$NUMMER\n" >>$LOG
echo 'SET VARIABLE LONGNAME '"\"$NAME\"" >/dev/stdout
read in

exit 0

Php file (uses snoopy library):

<?php
$number = $_GET["tel"];

$url = "http://tel.search.ch/?tel=".$number; // + evtl. Übergabeparameter
include "Snoopy.class.php";
$snoopy = new Snoopy;

$snoopy->fetch("$url");

$GrabStart = '<h5>';
$GrabEnd = '</h5>';

$GrabData = eregi("$GrabStart(.*)$GrabEnd", $snoopy->results, $output1);
$output1[1] = str_replace("ö", "oe", $output1[1]);
$output1[1] = str_replace("Ö", "Oe", $output1[1]);
$output1[1] = str_replace("ä", "ae", $output1[1]);
$output1[1] = str_replace("Ä", "Ae", $output1[1]);
$output1[1] = str_replace("ü", "ue", $output1[1]);
$output1[1] = str_replace("Ü", "Ue", $output1[1]);
$output1[1] = str_replace(",", "", $output1[1]);

# HTML Code entfernen und Zeilenumbruch einfügen
$output1[1] =preg_replace('/(\\s+)/', ' ',$output1[1] );
$output1[1] = strip_tags($output1[1]);
$output1[1] = str_replace("ZZZ", "\n", $output1[1]);
$name= explode("\n", wordwrap($output1[1], 20));

echo $name[0];

?>

The following sources helped me bringing this up in a really short time:
Reverse lookup configuration in Germany
Asterisk Gateway Interface
trixbox mit Anzeige des Anrufenden via tel.search.ch

SuisseID as Linux login token

SuisseID as Linux login token

The linux PAM authentication framework also supports PKCS11 based logins, which makes it easy for us to use our SuisseID for that.

Basically, you can use the entry PAM Authentication in this HOWTO. To use it with your SuisseID, you must have an eye on the following points:

/etc/pam_pkcs11/pam_pkcs11.conf configuration

Create a new module configuration:

# SuisseID pkcs11 module
pkcs11_module suisseid {
module = /usr/lib/libcvP11.so;
description = "SuisseID pkcs#11 module";
slot_num = 0;
token_type = "Suisse ID"
support_threads = false;
ca_dir = /etc/pam_pkcs11/cacerts;
crl_dir = /etc/pam_pkcs11/crls;
cert_policy = ca;
crl_policy = crl_auto;
}

and set this configuration as your PKCS#11 module:

# Filename of the PKCS #11 module. The default value is "default"
use_pkcs11_module = suisseid;

Store certificates of your CA under /etc/pam_pkcs11/cacerts

The module needs to check if your certificate is signed from a trusted source. In web browsers, this certificates are usually preinstalled, for the pam module we have to installed it by ourself.
The easiest way is to check who has signed your certificat and then export this certificates from Firefox to the folder /etc/pam_pkcs11/cacerts.

How to install a PKSC11 certificate module in Evolution

How to install a PKSC11 certificate module in Evolution

Last year, the Swiss government launched the SuisseID, a digital ID to sign documents and identify yourself in the web. It uses a smartcard as cryptographic token and is based on the PKCS11 cryptography standard.

Evolution uses the Network Securtiy Services (NSS) from Mozilla, over which you can access the PKSC11 module.

To sign your mails in Evolution, first install the drivers for you smartcard and check, if the pcscd daemon can recognize your smartcard.
I’m running Ubuntu 10.10, so if you use a different distribution, please be aware that the paths could be different. Then, change into your private NSS db folder:

cd ~/.pki/nssdb

This folder should contain the files cert9.db, key4.db and pkcs11.txt. If you have files like cert8.db and key3.db, you are using legacy databases and you must remove sql: from the following command. Otherwise, just use this command to register the module libcvP11.so in your NSS DB.

modutil -dbdir sql:./ -add "Post SuisseID" -libfile /usr/lib/libcvP11.so -force

After that, when you start Evolution a popup should ask you for your certificate password.

Faster Java based WCMS development

Faster Java based WCMS development

As I’ve mentioned in my last technology post, I’ve now also tried to use JRebel with a WCMS system, namely Day CQ5.3. It’s based on Apache Sling which uses Apache Felix as OSGI Container and a JSR-283 compliant java content repository to persist it’s content/data. Our basic approach to write components, services, tags and so on is to add all logic (java classes) into a OSGI bundle and deploy that on Felix. All the stuff that is needed to generate the view (jsp, xslt) is saved directly into CRX, the JCR of CQ5. So to load a page, two different classloaders are used, first DynamicRepositoryClassLoader (Sling/JCR) which loads the jsp out of the repository and then instantiates a class (for example for a tag) that is served by the OSGI bundle, for which FelixModuleClassLoader is used.
As you can read on www.zeroturnaround.com, Felix with JRebel is beta support, so why not try to use it with CQ at least to eliminate the deploy process of the OSGI bundle?

The result first: after a couple of mails with Lauri Tulmin from zeroturnaround, it finally worked.

My configuration:

  • In my maven project, I saved rebel.xml under src/main/resources, it contains the path to the classes folder of my eclipse workspace.
  • In the pom.xml of the project, I had to add the following line
    <Import-Package>*,org.apache.sling.jcr.api;version=2.0.4,org.apache.sling.jcr.resource</Import-Package>
    to the maven-bundle-plugin configuration
  • In the start script of CQ, I added the following parameters:
    CQ_JVM_OPTS="-noverify -javaagent:<path to jrebel>/jrebel.jar -Drebel.packages_exclude=sun.reflect"

The parameter -Drebel.packages_exclude=sun.reflect is a kind of a workaround of a JRebel bug, in the newest version it shouldn’t be necessary anymore.

With this configuration I can save my java files in Eclipse, reload the page and the changes are immediately viewable.
For now, this configuration isn’t tested in productive work. We plan to use it in the next couple of weeks and will for sure find some pitfalls… (hopefully not, but you know… 😉 )

I’ve also tried to write an own JRebel plugin to patch the Sling/JCR Classloader, but at the moment it’s not that stable to use it in productivity. You can find some Integration-Javadocs about that on the webpage of zeroturnaround.